
To create a new category or modify an existing one::
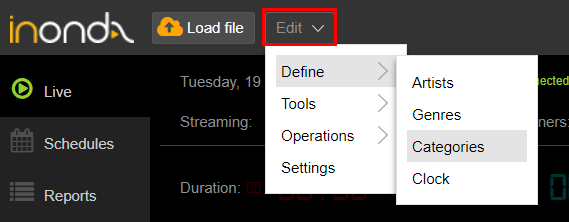
1.Click Edit > Define > Categories in the top toolbar.
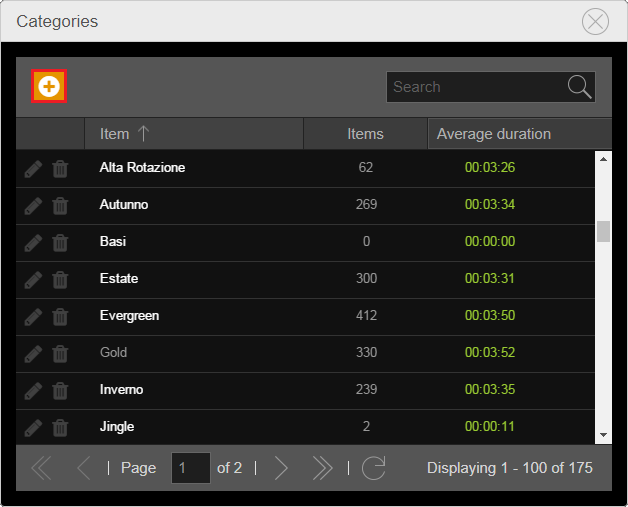
2.The Categories window shows all the previously added categories in the library.
Click the Add button.
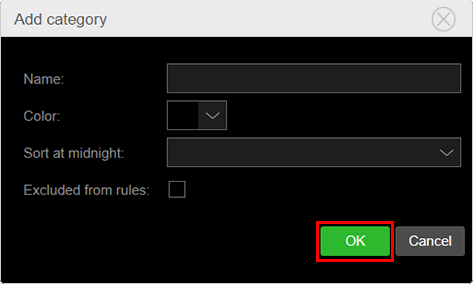
3.Enter a Name and, if desired, a Color for the new category.
4.Choose an option for Sort at midnight.
At midnight, the songs of the category are sorted according to three criteria:
-None
Songs are sorted always from the first to the last inserted in the category.
-Shuffle
Songs are sorted randomly.
-On air ASC
Songs are sorted by last on air date, placing on top those songs that have not been played in a long time.
The category order determines in which order the songs are analyzed during the on air rules verification, when the songs will be selected automatically, and therefore does not decide exactly what will be the next item to be transmitted. If you want this order to be the true order of airing when songs are selected from the category, you can enable the Excluded from rules option.
5.Click Ok.
The category is now defined and is showed in the Categories window list. You can use it to associate songs loaded in the library.
The Categories window allows you to edit or remove categories from the cloud at any time.
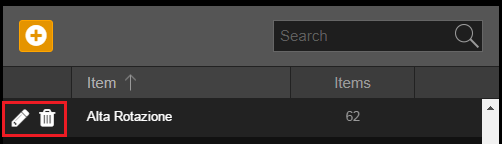
To do this, use the two buttons on the left side of the category name.
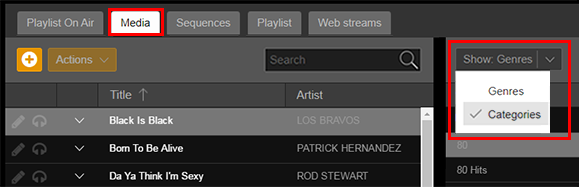
Categories are shown in the Media section, used for file browsing.
If in the Media section the search filter is enabled by Categories, the button array on the right of the section shows the categories with the chosen name and color. By clicking on a category, only its linked songs are shown.
You can also add or modify categories from the Editing or Properties window of the songs, using related buttons.
